Showing posts with label windows issues. Show all posts

Thursday, 3 January 2019

Windows Admin Password reset methods with disk attached


 Reset Windows Server 2012 Admin Password with Command Prompt

Command Prompt is truly an excellent command line interpreter which can be used to interpret various tasks at the cost of certain code lines in short span of time. Here we would implement cmd to remove the forgotten password. Read the steps carefully to perform the method:
Step 1. Firstly, create a bootable disk using CD/DVD or USB and insert it into the locked computer.
Reset Windows Server 2012
Step 2. Choose your language and click on "Troubleshoot" option.
Step 3. Click on "Command Prompt" button to start it on an advanced mode and type the command scribbled below when the black dialog box turns up:
d: cd windows\system32: move Utilman.exe Utilman.exe.old
                                              : copy cmd.exe Utilman.exe
type command
Step 5. Exit your command prompt and then click "Continue". Your Windows server 2016 computer will re boot and go to the logon screen. Here click Windows Key + U to oepn command prompt again, then type command:
net user   --> it will show all user accounts available in OS
net user administrator Pa$$w0rd2   --> it will reset password of account
start to reset Reset Windows Server 2012
Write the actual username and the newly created password in place of USERNAME and PASSWORD option. Pa$$w0rd2 will be set to password for the Administrator user (case sensitive).
Now your job is done! You can enter the locked account with the newly set password.
Note:
1) In case you enter any wrong command mistakenly, it can cause serious damage to the system.
2) If the user is not familiar with the cmd, better not use it .

Sunday, 16 September 2018

Group Policy Repair : Restore corrupted domain & domain controllers group policy


Syntax

DCGPOFix [/ignoreschema] [/target: {Domain | DC | Both}] [/?]

Parameters

ParameterDescription
/ignoreschemaIgnores the version of the Active Directory® schema mc
when you run this command. Otherwise, the command only works on the same schema version as the Windows version in which the command was shipped.
/target {DomainDC
/?Displays Help at the command prompt.

Remarks

  • The dcgpofix command is available in Windows Server 2008 R2 and Windows Server 2008, except on Server Core installations.
  • Although the Group Policy Management Console (GPMC) is distributed with Windows Server 2008 R2 and Windows Server 2008, you must install Group Policy Management as a feature through Server Manager.

Examples

Restore the Default Domain Policy GPO to its original state. You will lose any changes that you have made to this GPO. As a best practice, you should configure the Default Domain Policy GPO only to manage the default Account Policies settings, Password Policy, Account Lockout Policy, and Kerberos Policy. In this example, you ignore the version of the Active Directory schema so that the dcgpofix command is not limited to same schema as the Windows version in which the command was shipped.
dcgpofix /ignoreschema /target:Domain
Restore the Default Domain Controllers Policy GPO to its original state. You will lose any changes that you have made to this GPO. As a best practice, you should configure the Default Domain Controllers Policy GPO only to set user rights and audit policies. In this example, you ignore the version of the Active Directory schema so that the dcgpofixcommand is not limited to same schema as the Windows version in which the command was shipped.
dcgpofix /ignoreschema /target:DC

Monday, 2 April 2018

Change any windows IP configuration setting in CMD with this powerful tool NETSH


Show TCP/IP settings—The command
netsh interface ip show config
shows the system's current TCP/IP configuration settings. You can see whether the system is using DHCP or static addressing as well as view the system's current IP address, subnet mask, gateway address, and DNS servers.
Change network configuration—Netsh can change the current network configuration. The command
netsh interface ip set
  address "Local Area 
  Connection" static 
  192.168.0.10 255.255.255.0
  192.168.0.254
sets the IP address of the system configuration Local Area Connection to 192.168.0.10, the subnet mask to 255.255.255.0, and the gateway address to 192.168.0.254. This use of Netsh comes in handy for laptops that must switch between static and dynamic addressed networks.
Use a dynamic DHCP assigned address—The command
netsh interface ip set
  address "Local Area 
  Connection" dhcp
sets the IP address of the Local Area Connection system configuration to use DHCP addressing.
Change a DNS server address—When you change the system's IP address type, you almost always have to change the DNS server's address as well. The command
netsh interface ip set dns
  "Local Area Connection" 
  static 192.168.0.2

Dynamically assign the DNS server address—When you switch to dynamic DHCP addressing, you typically also want the DNS server address to be assigned dynamically. The command
netsh interface ip set dns 
"Local Area Connection" dhcp
sets the Local Area Connection interface to use a DHCP-assigned DNS address.
Configure a WINS server—Netsh also lets you configure WINS servers. The following command configures a system's Local Area Connection interface to use a WINS server that has the IP address 192.168.100.3.
netsh interface ip set wins 
  "Local Area Connection" 
  static 192.168.100.3

Work with other interfaces—Netsh works with DHCP, Internet Authentication Service (IAS), and RAS interfaces as well as the local network interface. The command
netsh dhcp dump > dhcpcfg.dat
dumps the local DHCP server's configuration to the dhcpcfg.dat file. You can use this file in conjunction with Netsh to recreate the DHCP server.
Work with remote systems—One of Netsh's best hidden features is its ability to work with remote systems. The command
netsh set machine remotecomputer
sets the current computer to a different system on the network.
 Save the current configuration—The Interface Dump subcommand saves your current network configuration and generates a script that you can use to regenerate the configuration. The command
netsh interface dump > 
  mycfg.dat
redirects the Dump command to the mycfg.dat file.
Restore network configuration—The Netsh Exec command runs a Netsh script file. The command
netsh exec mycfg.dat
restores to your system the network configuration data that the preceding sample command saved.

windows server 2012 went to CORE mode opening CMD and lost GUI suddenly(by uninstalling some inbuilt features)


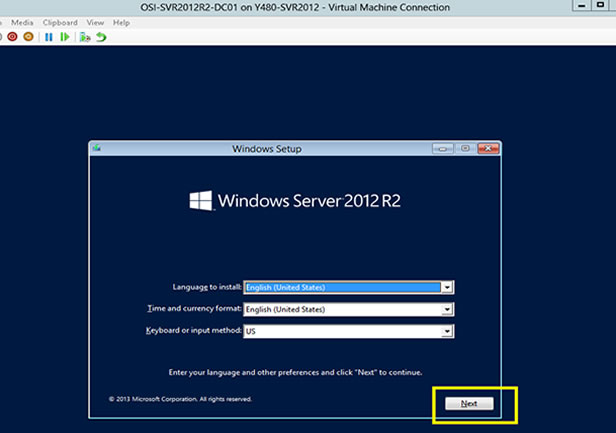
Procedure to recover GUI in windows 2012 and 2012R2:
Windows Server 2012 includes .NET Framework 4.5 and Windows Server 2012 R2 includes .NET Framework 4.5.1. The .NET Framework provides a comprehensive and consistent programming model to build and run applications (including Roles and Features) that are built for various platforms. Windows Explorer (Graphical Shell), Server Manager, Windows PowerShell, IIS, ASP .NET, Hyper-V, etc, are all dependent on .NET Framework. Since there are multiple OS components dependent on .Net Framework, this feature is installed by default. Therefore, you do not have to install it separately.
It is not recommended to uninstall .NET Framework. In some given circumstances, there may be a requirement to remove/re-install .Net Framework on Windows Server 2012/2012 R2.
When you uncheck the .NET Framework 4.5 checkbox in the Remove Roles/Features Wizard of Server Manager, Windows will check all roles/features that may also be installed as it would need to be removed as well.. If there are other roles or features dependent on .NET Framework, those would be listed in this additional window.
it will leave the server installed in Core and you will be able to get the command prompt only.
For Example:
If you read through the list, the components that are affected by this removal are listed as follows:
  1. .NET Framework 4.5 Features
  2. RSAT (Remote Administration Assessment Toolkit) which includes Hyper-V Management tools and Hyper-V GUI,
  3. User interfaces and Infrastructure, which includes Graphical Management Tools and Infrastructure Server Graphical Shell (Full Shell and min Shell),
  4. PowerShell which will remove complete PowerShell 4.0 and ISE
The list of components may differ depending upon the Roles and Features installed on the Server machine.
How to recover from this situation and to bring back the power shell, .net feature and UI in 2012, 2012U1
As stated earlier, this will leave the server without a graphical shell for user interaction. Only the command prompt will be available post reboot.
If you get into this situation, run the below commands in the Server Core’s command prompt window to help you recover:
i) Run the below commands one by one
DISM.exe /Online /enable-feature /featurename:NetFx4 /all
DISM.exe /online /enable-feature /featurename:MicrosoftWindowsPowerShell /all
ii) Reboot the server
iii) To restore the GUI need to run the PowerShell commands. Below procedure how to open PowerShell prompt in server core’s command prompt
a) To begin, press CTRL-ALT-Del and select Task Manager from the list
b) Once Task Manager Opens select File and Run new task
c) You should now see the Create new task menu, type PowerShell.exe and select OK (or) in CMD type start powershell
d) PowerShell prompt should now be open
iv) Run the below commands on the PowerShell prompt
Install-WindowsFeature Server-Gui-Shell
Install-WindowsFeature Server-Gui-Mgmt-Infra
Once the GUI Shell is installed, you will need to restart the server with the following command:shutdown -r -t 0
v)if you get error like component store corrupted then we need to repair DISM store
 Dism /Online /Cleanup-Image /CheckHealth
 it will show DISM store corrupted
then we need to repair that by below command
 Dism /Online /Cleanup-Image /RestoreHealth
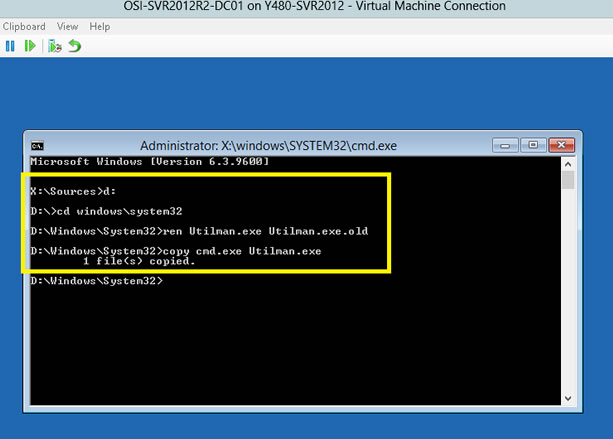
if this step also fails then we need to copy sources folder from windows server 2012 iso file to local drive or mount as DVD drive
Dism /Online /Cleanup-Image /RestoreHealth /Source:wim:Full Path to sources/ install.wim file:<Index Number>

OR

(To prevent DISM from using Windows Update for online images)
 Dism /Online /Cleanup-Image /RestoreHealth /Source:wim:Full Path to sources/install.wim file:<Index Number> /limitaccess

 Substitute <Index Number> in the command below with the actual index number (ex: "1") for the edition (ex: "Pro") you want details about from step 6A above.
note: if you copy sources folder to c drive is better option than from a cd drive iso file.(use xcopy /h /c /k /e /r /y d:\sources c:\sources to copy from d drive to c drive

For example:

 Dism /Online /Cleanup-Image /RestoreHealth /Source:wim:C:\sources\install.wim:1 /limitaccess

Click image for larger version. 

Name: DISM_RestoreHealth_wim_sources.png 
Views: 4849 
Size: 23.8 KB 
ID: 23329
in my case index number 2 worked for me
after that try installing gui commands

Tuesday, 13 March 2018

Configuring database connection results in Error: Host 'xxxxxxx' is not allowed to connect to this MySQL server


Configuring database connection results in Error: Host 'xxxxxxx' is not allowed to connect to this MySQL server

Problem

While trying to connect to the database during installation of JIRA you receive an error.
Steps To Reproduce
  1. Start installation of JIRA, on a different server than the one which hosts your database.
  2. In the configuration screen for the database connection, use the "root" username and password.
The following appears on the screen:
 Host '10.0.0.20' is not allowed to connect to this MySQL server

Diagnosis

This error only occurs while using MySQL Database Server (All Supported Versions)

Cause

This error occurs due to the default configuration your MySQL database is currently using.  This configuration allows connections only from the 'root' user when coming from 'localhost' and not other IP address ranges.

Workaround

The following is a workaround for the above situation in the case that you must use the "root" user, however it is not recommended as this creates a security vulnerability. For the suggested fix for this issue please see Resolution below.
  • Open your MySQL Terminal;
    • In Linux:
      mysql -u root -p
    • In Windows, open the MySQL command line.
  • Run the following queries:
    USE mysql;
    SELECT user,host FROM user;
    (info) Note: You will see that the "root" user is only related to the "localhost" host
  • Once it's verified that the root user only has permission to connect in localhost, run the following query:
    GRANT ALL PRIVILEGES ON *.* TO root@my_ip IDENTIFIED BY ‘root_password‘ WITH GRANT OPTION;
    (info) Where "my_ip" is your JIRA server ip and "root_password" is the root user password.
  •  If you want to, run the first query again to verify that the root user has the connect permission with JIRA's server IP;

Resolution

Please set up a new user and database per the following recommended instructions. These instructions come directly from our official documentation: Connecting JIRA to MySQL.
  • Create a database user which JIRA will connect as (e.g. jiradbuser). Remember this database user name, as it will be used to configure JIRA's connection to this database in subsequent steps.
    mysql> CREATE USER '<USERNAME>'@'<JIRA_SERVER_HOSTNAME>' IDENTIFIED BY '<PASSWORD>';
  • Create a database for JIRA to store issues in (e.g. jiradb). The database must have a character set of UTF8. Enter the following command from within the MySQL command client. Remember this database name, as it will be used to configure JIRA's connection to this database in subsequent steps.
    CREATE DATABASE jiradb CHARACTER SET utf8 COLLATE utf8_bin;
  • Ensure that the user has permission to connect to the database, and permission to create and populate tables. These can be provided with the following:
    GRANT SELECT,INSERT,UPDATE,DELETE,CREATE,DROP,ALTER,INDEX on <JIRADB>.* TO '<USERNAME>'@'<JIRA_SERVER_HOSTNAME>' IDENTIFIED BY '<PASSWORD>';
    flush privileges;
Tip:
To confirm if the permissions were granted successfully, log into the DB server with the JIRA DB user and run the command below:
SHOW GRANTS FOR <USERNAME>@<JIRA_SERVER_HOSTNAME>;